SVGcuts

Showing posts with label fun. Show all posts

Tuesday, May 17, 2016

Resisting the urge to wash dishes!

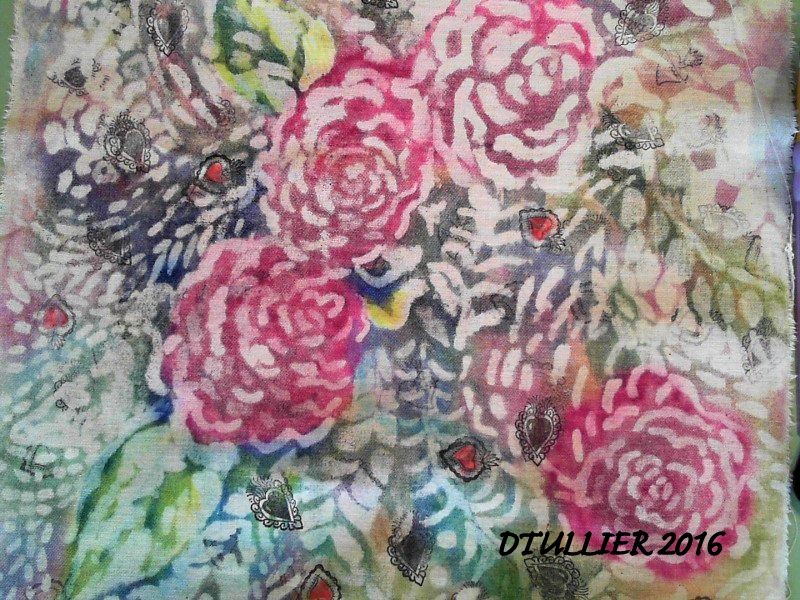
Fabric transformation!! I love fabric and this is one of the most exciting things that I have done in a long while!!!


I love fabric so much more than I like washing dishes.. so a new use for dish detergent is for me. I love making my own decorated fabric for many purposes. Well when  I heard that you could use dish detergent to mask or create a frisket on fabric, I was sold. This detergent is brushed on and when dry keeps the paint from coloring the fabric. So I wanted to see what I could accomplish… Please I hope you enjoy my video. 

Supplies:
muslin (on hand)
Splash Inks 
Paint Brushes (on hand)
Acrylic stamp squares
Heart stamps from the Rubber Stamp Depot available at AlteredPages
StaZon Ink Pad
thick dishwashing detergent
bowl
water (to rinse)
Iron to press with
airbrush (optional)
Rit dye fixative ( on hand)


Will be updating you with a finished project using this fabric and also many other ideas on using this technique!


Tuesday, March 15, 2016

Incredible Egg Fun!


I love eggs…I clean the shells out if I am going to use them for baking or scrambling. I love the texture. I decided to create something a little different, a box made from an egg. I had to cut it in half it was fairly easy with a rotary grinder and a cut off wheel. I then used several of the products from AlteredPages including a Mailbox Muse stamp set.

Please let me know what you think of my crazy creation.


Supplies:
Egg Shell
Wood furniture biscuit from home improvement store
Muse Dragonfly Stamp
StazOn Jet Black Ink Pad
Trim  or Fiber 
German Scrap 
Glass Glitter 
Aileen’s Tacky Glue
Crystal Lacquer Mixing Mica
Straw
Marker Airbrush
Gold Sharpie
Tombow markers
Hot Glue


See you next month, Happy Spring!!


Tuesday, September 29, 2015

Evil Eye Piñata

Evil Eye Pinata


This is my Evil Eye Piñata. I am enamored with AlteredPages products. I also have always been inspired by the wonderful creative artists that make up AlteredPages and their Design Team. I never would have dreamed that I would become part of this great group. Let’s get started…


11864809_10206068272599372_526114609682950943_o

Supplies
Oatmeal box (round cardboard )
Paper Mache Cones
Aleene’s Tacky Glue (on hand)
hot glue and gun (on Hand)
Mod Podge
Assorted Cardstock
Splash Inks
Gelatos 
gesso
Bazzill Papers
acrylic paints
Sharpie markers
The Eyes have It Collage sheet
Pan Pastels
Silk Sari Ribbons
Dyeable  Seam Binding
Alcohol  for blending Sharpie ink on Seam binding.
Yarn for hanging


Here is my video offering:


Tuesday, July 28, 2015

Halloween Wreath for AlteredPages Design Team!

I am so excited about Halloween. I don’t really do much for the day but love to make fun stuff to enjoy it. I love using stuff that normally would have been thrown away. Yes my husband is always chiding me about my hoarder ways. I saw this “craft” paper packing and how to save it for something..It worked fabulously with this project. I want to remind all that there is no glue holding the paper to the wire. I used only the chalk paint to make it stay. It is very sturdy. I love all of the great supplies that AlteredPages has. These items help my imagination soar. I also found by using the little Pots I am more organized…FEAR, FEAR of organization…that really scares me. I hope you enjoy my post!

11659448_10205685032338605_530420501837339704_n


cl3wreath

Supply list:

Wire Hanger
Craft paper or newpaper cut into squares 5 x 5
Paper plate or tray for painting
Brushes (one for painting and a toothbrush for splattering)
Metallic paint (on hand)
gloves (optional)
Tacky glue (on hand)
Collage Sheets:
Scissors

Please visit  AlteredPages.com

Friday, December 19, 2014

Snow Globe Tag!

Altered Snow Globe Tag!

10492253_759166940823321_1773584981629683129_n
I have always bought my mom Snow Globes for her Christmas present. She loves them so. Unfortunately hurricanes took away her home and also her large collections of Snow Globes. So I make this fun tag for her! I know that she will treasure it, It will have a double meaning to us both. I hope that your holidays are filled with love and caring. I hope you enjoy my post!
10864644_10204123111812731_1147220740_o
Supplies
Here is the video link to my creative process:

I love Alteredpages and would love a gift certificate or present from them! If you are like me don’t forget to leave your list out so others can find it. Have wonderful and happy Holidays!
Don’t forget to visit my Blog!
Best,
Debi

Friday, March 28, 2014

My Memories!

My Memories!

I have truly enjoyed my time as a Design Team Member for CraftwellUSA. I have grown so much in so many ways. I have developed friendships that I hope will last forever. I have met people that I have only dreamed about meeting! Who would have ever thought that buying a crafting tool would lead to such a wonderful outcome. I end this wonderful time with my personal new little Scrapbook.
b1
I am so excited to begin a new day and a new focus in my life. So to celebrate I created this booklet.  I feel that this cover really reflects me. Thank you Teresa Collins for your great paper collections and embossing folders. Your collections really reflect so much of me!
b4
This is all from Teresa Collin’s “Hello My Name is” paper collection. I love the papers and sentiments reflected in this collection. One of my favs is the passage by “Jack Kerouac”, he writes about how those who choose to be different so change the world!
b2
I would love to believe that I have change a little piece of the world by sharing my humble works and growing with you!
Much Love to All,
Debi

Thursday, February 20, 2014

February is a Month for Love!

February is a Month for Love!

I know that Valentine’s Day is over but the lovely month is ripe for celebrating the love we have for each other! I would love to see it practiced every day instead of just one month! So I will continue this week with the love of the card. This is not a folded card but on that sits on the desk wide to exclaim my passion!


card
My card was a joy to make and I want to share all of the goodies I used to make it with you!
Supplies:
Craftwell’s eBosser I love this machine it produces such wonderfully clean cuts as well as picture perfect embossing!
Basic Grey Papers – Patterned
Bazzill – Solid
Tim Holtz – Distress inks
Ellentina Dies – MY Favorites!
Glitter!
K & Company Chipbox letters

chipinkspapers
I have to say that my eBosser loves my Ellentina dies! So do I! I hope that the photo shows you how much beautiful detail is in the cut!
details
Just to show you the size of the die cuts here is an example using a coin next to the die! These dies are beautiful but you should see their architectural set!
Ellen
Amazing tools for an amazing amount of fun and stress reducing crafting for me! I also get to share my love with my project to those close to me!
Next week we venture into one of my favorite Holidays!!!!
MARDI GRAS!!!!
Debi

Saturday, November 23, 2013

Fun with Cheery Lynn Dies Part 1

Fun with Cheery Lynn Dies

Part 1

This is a two part project post as it requires a little more to give non-sewers options to make the finished product. I don’t want to spoil the reveal so I will tell you the method and techniques I used for the parts I made this week. You have to come back next week to see what the final project is…

I am so excited to do this so…

NO PEEKING

Camera 360

Well you can see by the photo that this is a recycling project and I will also share that it is a fabric project too! I am making another of those cool Steampunk items for my crazy relative. I decided to make my gift a super neat kind to the environment recycled project. I am using a two-liter soda bottle to make my special rings.

So here is the supply list:

a two liter soda bottle with the top and bottom cut off

I used a rubber band to roll the plastic very tight and left like this for several days.

Aluminum duct tape

Cheery Lyn Gear Die (LOVE THIS ONE)

B361__60783.1372691486.1280.1280

Craftwell eBosser

Sandwich:

A, B, C, D

Masking tape to transfer the tape to the plastic

A bone folder to smooth the tape

I first cut the Gear Die out of the aluminum tape . I love the sharp cut I get using the Craftwell eBosser.  I then place the masking tape over the metal tape after I weeded the unwanted parts off of the piece.

I cut the plastic from the two liter bottle to the size I wanted very close the the size of the aluminum tape’s width. I next transferred the design to the plastic. I used the bone folder to rub the design onto the plastic to secure it.

Camera 360

Now it is still a mystery project until the reveal next week but if you look closely you can see a special hint in the photo. There may be a pressing of fabric around. I am so excited and can’t wait to show you the second half. So while you wait can you venture a guess as to what I am making? Please leave a comment below for me! Have a great week and get ready for the second part next week.

Debi

Thursday, August 2, 2012

Trains, Trains, Trains!

Hobbies, Hobbies, Hobbies!

I am so very lucky to be married to a man who can design and build almost anything. I can’t begin to tell you about all of the neat thread holders, knitting machine stands and even sewing machine tables with multiple inserts  for all of my machines that he as built for me. He also built my custom bathroom with a tiled shower stall next to my whirlpool tub. So when he asked me for a favor could I turn him down…NO!!!!
My husband has a love for trains. All trains but mostly his HO-Scale ones. He has a room devoted to them and he actually builds beautiful little buildings and functioning turntables and such.  He had bought some blank freight cars (box cars) and wanted to get decals for the sides. He asked if I could create decals for the sides of his cars. Well talk about worried as I didn’t want to let him down. But these things  are so very tiny but my Purple eCraft was a champ in cutting out a “decal” for them!
072520123425
At first glance you probably are wonder what I am talking about so here it is.  This is a boxcar kit. It is a blank car and using decals you make the line that you want. So I got to work on making my design.
072520123420
I first found the logo’s on the web and brought them into MTC software and did a pixel trace on them to make my cutting file. It was the first time for me to attempt something this tiny. I am very pleased with my outcome. My eCraft really met the task with flying colors!
072520123415
This is a very tiny vinyl cut out of my “Shock Control” lettering. I was so nervous about weeding it. I used my Craftwell Vinyl for the job as well! Love that vinyl.
072520123416
To give you an idea  of how tiny we are talking about. I still can’t believe that I cut something that tiny. I am awed by my eCraft .
072520123414
This is another tiny logo I am working on. See how tiny it is see how clean the lettering is…WOW. I used a brand new blade and also the lightest pressure setting on my machine. I did not use a stabilizer just the vinyl with its backing paper.

072520123419
See how little the letters are. It was so much fun but had to wear magnifiers to see it.
072520123422
Here I used a Studio G sepia inker to antique my “decal”. I bought it from Michael’s. I am so happy that I could do this for my husband. He always does so much for me!

072520123424
See how nice it “fits” in. He built all of the builds in the background with popsicle sticks. Wild huh?
I am so thankful that I have such a fun family! Remember sometimes we can take the step to use our “crafty stuff” to help out and make someone else’s ideas come to life.
I hope that your Summer is a blast. Don’t forget to leave me a note about your “odd” projects.
See you next week!
Chant for the week…”eBosser, eBosser…”

Thursday, June 7, 2012

Vacation “SmasH” Book

Initial Shaped Book to Treasure

Well I was trying to think of a fun thing for my grand-daughter to do each day. I came up with a (I hope) fun memory book for her to make with me each day. I know that I treasure everyday with her and now she will be able to have her own memory book.  She will have to be supervised with it because of small parts but I know she will love creating pages in it.
sbook
Supplies:
  • Cereal box chipboard
  • Craftwell Ecraft Die Cutting Machine
  • light weight cotton fabric from JoAnn’s Fabrics
  • Several Sheets of solid colored cardstock
  • Signify Pink’s Glimpses “Life is a Party” paper and embellishment set 
  • Sewing machine optional
  • xyron 5 inch stamp creator or adhesive of your choice.
I first cut out my “book covers” out of chipboard. I used a heavy font and blacked it out so that I removed the center hole and could use it as a cover piece.
IMG_5744
I used a pressure setting of 7 and a multi-cut of 2, I used no tab setting. I get clean cuts with my ecraft. I also used my Ecraft Pro Software to send my “R” to my machine.
I next covered the front of my “R” with cloth. I embellished it with pre-adhesive cut outs from Signify Pink. They have such great paper and embellishment assortments. Signify Pink want you to know that they have closeout prices and that products are going fast! They  have a pretty good amount of inventory, to meet your needs. . Be aware athat wholesalers can order here:www.signifypinkwholesale.com
If they don't have a wholesale account, there's a place to request it and we do it pretty quickly.
They can look at the retail site, just to see the product though –
www.glimpsesbysignifypink.com  I just love their wild and bright colors. They make my projects just jump to life.
clo
I love the ease of using these great products. They even have lettering, so much to make your project fun.   Next I bound all together at the top so that it would open like a flip chart. That way we have plenty of filling room!
IMG_5747
I love the extras in the SignifyPink packages such as the pinwheels, and banners with baker twine. In my paper assortment there was also a “Scrappy Bag” with fun embellishments. Wait till you see the Black and White grouping, or  better yet find out how to order your own right now at www.glimpsesbysignifypink.com
IMG_5748
I know we will have such fun filling the pages together. Don’t let your special days go without catching some of those memories.
See you next week,
Debi

Friday, May 18, 2012

Happy Mother’s Day to Me

Happy Mother’s Day to me!

Well this is certainly a change for me. I have always wanted a personal little book to carry around to record my thoughts. I know it sounds different but I love those little composition books. You know the ones..
051120123103
But I want pizazz and color and a neck ribbon with a pen attached. To much to ask for you might ask…NO! Not with my
CraftwellUSA eCraft we can make my dream come true..
Supplies:
  • CraftwellUSA’s  eCraft die cutting machine
  • cereal box chipboard
  • Fabric
  • Heat N Bond
  • Artificial Flower
  • Xyron Mega Runner
  • Extra Large RikRac from Plum Deals
  • Ribbon
  • Fimo Clay from JoAnn’s Fabrics
  • Fun Fun Fun
Here we go. I first cut my bookend shape from both the cereal box chipboard and my main fabric with the same shape. I used Heat N Bond on the fabric so I could attach it to the chipboard.
051120123101
051120123104
My eCraft cuts chipboard like a champ. I did use a pressure setting of 8 and multicut of 2 for the chipboard. I did not use a mat at all. The fabric cut with a pressure of 4 and again I did not use a mat.
I then cut a piece of fabric long enough to cover my little notebook.. I used enough to cover it from the inside seam to the other seam. I will carry this all the time. I have always wanted a little journal for quick thoughts.
051120123105
I used my iron to bond the fabric to the chipboard. It quickly bonded and I was ready to attach it to the exterior of my booklet, but first to make a pencil holder and closure to keep my booklet closed when not in use.
051120123107
I used extra large Rik Rac that I had gotten from “Pick Your Plum” a daily deal site. I love Rik Rac.
I cut three pieces large enough to hold a pencil and then placed two on one side the of holder, and one in the middle on the other side. When your pencil slides into the ric rac it locks the booklet closed. Xyron’s Mega Runner did a wonderful job of attaching my outside cover.
051120123112
I also cut a little “me” out of Fimo clay. You can cut this with the eCraft . The trick is to make a thin sheet and then bake it till it is almost done. I did use a die cutting machine for this project however.

051120123111 
Here she is ….Happy Mother’s Day to Me! and Belated to you too! I love making items with my CraftwellUSA’s eCraft Die Cutting Machine.  See you next week!

Thursday, April 26, 2012

Grandma’s Summer Fun Recycled Play

Grandma’s Summer Fun Using Recycled Drink Cylinder

This grandma is so excited about Summer coming.  Summertime means I will have my babies for a short time. My baby girl is  3 and half loves to craft with Granny! So I decided to help the environment and have fun with Rei too! So I am putting together crafting ideas for our vacation time together. I want this planet to be around and litter-less when my grands and their kids inherit this earth. So I am creating a fun way to get my Reilee to recycle and yet have a blast.
IMG_5319
So this is what we are starting with!
Supplies:
This is so super simple. I have provided the face piece files for either the eCraft Pro Software or the svg files for you! You will have to manual separate them and then cut them out. I love the ecraft as I can use scraps to make my small pieces.

IMG_5313
I used my Xyron’s Mega Runner to adhere the fun foam to my tea container. I also used the Mega Runner to attach my “hair” as well.
IMG_5314
For the smaller pieces I ran those thru my Xyron’s 1.5 Create-A-Sticker it is so easy and not messy at all. I love the all over coverage!
IMG_5315
Here you can see my individual face pieces ready to be placed. This is so easy and I know that Rei will have a blast. I can’t wait to make accessories for them too! I can see bows, masks, and even party hats made for our special container!
IMG_5320
and here I am the Grandma recycled instant tea container! Are my ears really that big…LOL! Ready for a night on the town with my puzzle earrings. I just hope that my little grand-daughter has fun playing with me and making her own storage person. Yes you can put your “stuff” still in the container!
IMG_5318
I wish all of you joy for every day of your life! I hope that you have many special days and that my everyday  will  remain just that a special day.
See you next week, Debi

Thursday, April 12, 2012

Easter Blooming Recycling Project

Recycling Fun and Spring Flowers!

I love Spring, but I have not known its merits long. I had lived all of my life with virtually no season changes. We laughed and said that we only had two seasons hot and hotter. But I recently have had the pleasure of seeing the seasons change first hand and I love it. I love seeing the green appear from the brown remains of winter.Seasons do reflect life’s journey in such a way that I have now realized so much. I love seeing the daffodils rise up and show their beautiful faces. The Iris, azalea, dogwood, and numerous blooms how breathtaking they are. So to give back to Mom Nature and to keep several plastic bottles out of the landfill I designed this project. I will show you how I made them into Easter or Spring gifts that I hope will bring smiles.
bottle

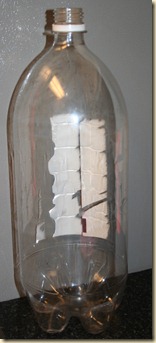
We all know the unloved plastic soda bottle. Well I used my craft knife and cut the bottom off about five inches from the bottom. By the way I use the top for my gardening funnel. You can use this to make bands for any plant pot, container, or even a glass. It is easy and doesn’t require a lot of work , yet the outcome is very pretty.

Now we are ready to get started.


Supplies and Settings

  • one 2 liter soda bottle cut  in half
  • craft knife
  • quilting weight cotton fabric from JoAnn's Fabrics
  • Beautiful Fabric from a mystery giver used for eggs..
  • stitch witchery or straight stitch sewing machine
  • Bias tape of your choice any fabric store or you can make your own
  • eCraftshop Pro Software for manipulating images
  • eCraft Die Cutting Machine
  • veggie chopping mat from DollarTree
  • 606 Spray and Fix Fusible Adhesive from Walmart

  • Svg File of Chocolate bunny from Oh My Crafts..
  • Svg of Egg made from shape file in eCraft Pro Software
  • Iron on Crystals and application tool  from Kandi Kane
  • Hook and Loop tape for closure from Walmart


After cutting my bottle, I next brought my image svg into my eCraftshop Pro software. It is so easy to use to make multiple images.  I sent these on to my machine and the cut out was very nice.

IMG_5086

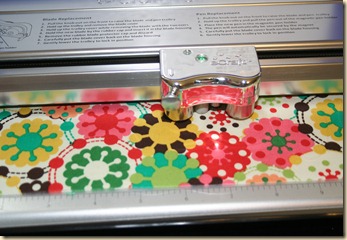
Settings for eCraft machine pressure is only 4.5 and no tabs. I used the veggie mat sprayed till it was very sticky and used a brayer to make sure the material was well stuck. I can cut plain fabric (cotton quilting weight) using this method.

cut

It cuts so very cleanly. I actually used my leftover and made more. you can see the clean cut in front of the cutter’s trolley.  Love this.

bunI

Check out all of my Chocolate Bunnies…non caloric. but they are soooo SWEET!!!

IMG_5176

Next I cut a rectangle of pink fabric two inches longer than the circumference of my bottle. I cut it four inches wide. I pressed under a quarter inch on both edges. Next I used a contrasting bias tape to put on the edge of my pot band. I made mine but you can buy it at any fabric store. You can use stitch witchery to attach it to the band. I used my sewing machine but either way works fine.

IMG_5177 

I received this beautiful fabric strip from a mystery person. I love it and used it to make some sweet Easter eggs for my bands. I have plenty left for more projects.
egg

Next I used my Heat n Bond to attach my bunnies and eggs to my bands. I also used hook and loop tape on the ends to fasten the band around the “pot” or vase. I used my Ranger Stickles and iron on crystals to embellish my Easter egg and rabbits.

band

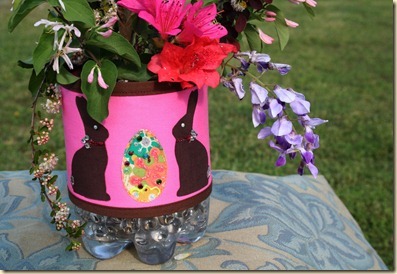
One last note, I purchased the water crystals at the DollarTree store.  You will see a bounty of blooms from my yard. I am blessed with so many beautiful flowers. I love the Wisteria, and Bridal Wreath, I love the exotic pink honeysuckle. So much to be thankful for. I love the rebirth that Spring gives us. Life is such a wonderful gift!
new

One big purple bearded Iris and some beautiful foliage finish out my Spring Chocolate Bunny Band flower container. I am making several for friends so they too can enjoy and be “green” too!

next

I hope you enjoy my flowers!

pro

Next week I will share another recycling project. This is so important to me, I pride myself on my saving and using stuff over and over again in new ways.

Happy Easter and Happy Spring to all!

Debi